Safe Blender Usage
A comprehensive guide to using your kitchen blender safely and effectively — covering correct assembly, ingredient loading order, advanced blending techniques, thorough cleaning, and troubleshooting. Following these steps ensures perfect textures, protects the motor, and prevents accidents.
Steps
Inspect the blender before use: check the jar for cracks, ensure the rubber gasket is intact, and verify the blade is not chipped or bent. Damaged equipment can cause leaks or accidents.
Firmly attach the blade assembly to the jar base: screw until you feel resistance and hear a locking click. If the blade mounts from the bottom, ensure the sealing ring is correctly seated to prevent leaks.
Lock the jar onto the blender motor base — align the jar's markings with those on the base, press down gently and twist until it locks. Gently pull the jar upward to confirm it is secured.
Add liquids first (water, broth, milk, oil, etc.), then soft ingredients (fruits, cooked vegetables), and finally hard solids (ice, nuts, raw meat). This loading order protects the blade and promotes even circulation of ingredients.
Do not fill the jar more than two-thirds full (or to the maximum fill mark). Hot ingredients expand during blending, and overfilling can cause splatter or sudden pressure release from the lid.
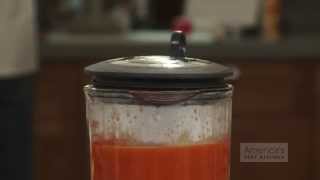
Place the lid firmly and hold it down with your palm before starting. For hot mixtures, leave the lid slightly ajar or use the lid's vent hole covered with a folded kitchen towel to allow steam to escape and prevent a vacuum effect.
Start the blender on the lowest speed setting or use Pulse mode. Allow ingredients to settle for a few seconds, then gradually increase the speed. Avoid jumping abruptly from zero to maximum.
Use Pulse mode for thick, cold, or dry ingredients: press and release the Pulse button in short 1–2 second bursts to chop evenly without overloading the motor. Repeat several times until the desired consistency is achieved.
When running the blender continuously, do not operate for more than 60 seconds without a break. Turn it off, allow the motor to cool for 30–60 seconds, then resume blending.
If ingredients are not blending evenly (air pockets or a tunnel forms in the center), stop the blender, remove the jar and gently shake it, or use a silicone spatula to redistribute ingredients from the walls toward the center. Never insert the spatula while the blender is running.
When blending is complete, switch off the motor entirely and wait for the blade to fully stop spinning before removing the lid or pouring the contents.
Clean immediately after use: fill the jar halfway with warm water and add one drop of dish soap, then run the blender for 20–30 seconds. Rinse thoroughly and allow to dry inverted on a clean towel.
For a deeper clean, fully disassemble the jar, blade, and gasket. Wash each part separately in warm soapy water, paying close attention to the spaces between the blade edges where food residue accumulates.
💡Pro Tips
- •Use Pulse mode for precise texture control: creamy hummus requires continuous blending, while salsa and breadcrumbs benefit from short Pulse bursts.
- •For creamier smoothies, freeze fruit in advance and add liquid in stages, alternating with solid ingredients.
- •Cut hard ingredients (carrots, beets, nuts) into pieces no larger than 2–3 cm before adding them. This reduces motor wear and blending time.
- •Add a teaspoon of oil or a small amount of extra liquid if the mixture becomes too thick and the blender rattles or vibrates excessively.
- •For hot soups, allow the preparation to cool to at least 70°C before blending, or process in small batches with a vented lid to prevent steam-related accidents.
- •Periodically lubricating the blade shaft (if removable) with neutral food-grade oil extends the bearing's lifespan and reduces noise.
- •Read your blender's manual: motor power and maximum capacity vary — a 500W blender requires more care with hard ingredients compared to a 1500W model.
⚠️Common Mistakes
- •Starting on maximum speed from the beginning: causes splatter, creates air pockets, and can destabilize the jar. Always start on low speed.
- •Blending without the lid or with a loose lid: contents can be ejected from the jar, causing burns or a messy kitchen.
- •Running standard blenders continuously for more than 60 seconds: overheats the motor and may trigger thermal protection or damage the windings.
- •Overfilling the jar above the maximum mark: built-up pressure can dislodge the lid while blending, risking hot liquid splatter.
- •Blending extremely hot ingredients without venting: generated steam rapidly increases internal pressure. Always allow steam to escape before starting.
- •Improper cleaning of the blade and gaskets: dried residue is hard to remove, promotes bacterial growth, and can affect the flavor of future preparations.
- •Inserting metal or rigid utensils into the jar while the blender is running: these can irreparably damage the blade and jar.
- •Ignoring unusual sounds (metallic grinding, excessive vibration, burning smell): these indicate a mechanical or electrical problem. Immediately stop the blender and inspect it.